Update 2016: This method is pretty much just wrong. See this post instead.
At the time Cycles came out in Alpha, I was playing around with HDR lighting in Blender internal. I found BI to be annoyingly slow and impossible to get that magic one-click lighting that all the non-blender websites had promised HDR could do.
You might remember some fool using this in some tutorial…
So when Cycles showed up, I figured the day was saved and all my problems would magically disappear.
Well most of them did, but HDR lighting still looked flat and boring, lacking the shadows from the sun even in simplest of outdoor images.

However, a couple years (has it really been that long?) later and I can now tell you where that magick one-click-lighting button is!

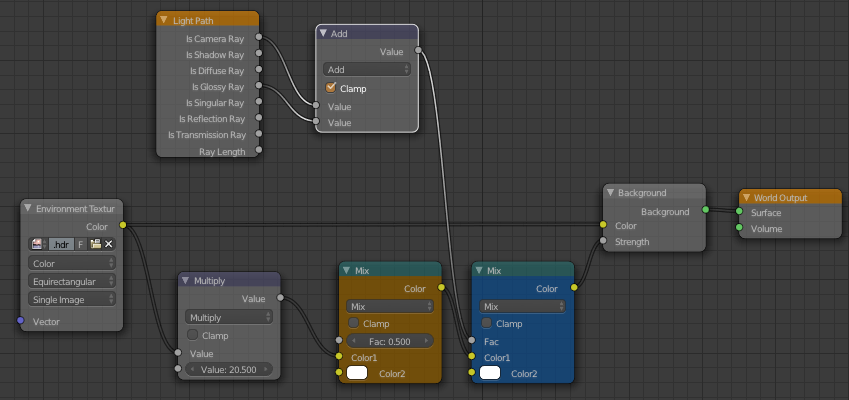
Well its not technically a button… but a single node connection:
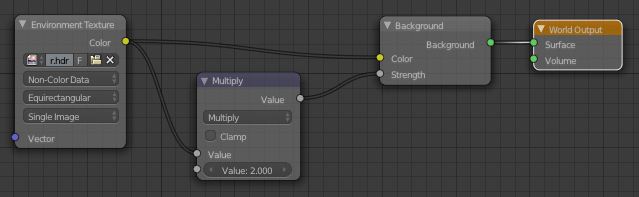
All you need to do is connect the image to the Strength input of the Background shader and it’ll use those awesome bright pixels of the sun as the strength, meaning the sun is actually brighter than all the other white things! Hence the awesome shadows and realistic lighting.
The Multiply node is there to control the strength of the light, I increased it to 2.0 since it was a little dark, but it could probably even go higher since the shadows are a bit dark here.
Update:
Don’t forget that we’re working with nodes here people! Anything’s possible!

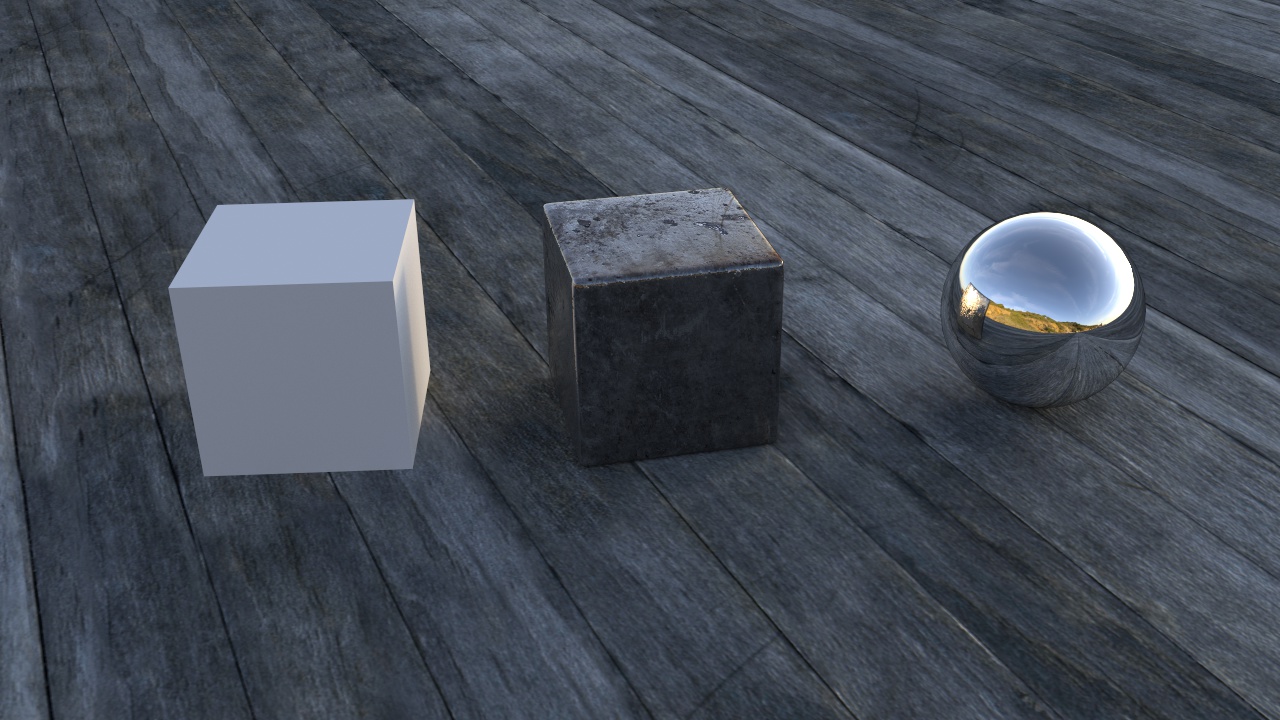
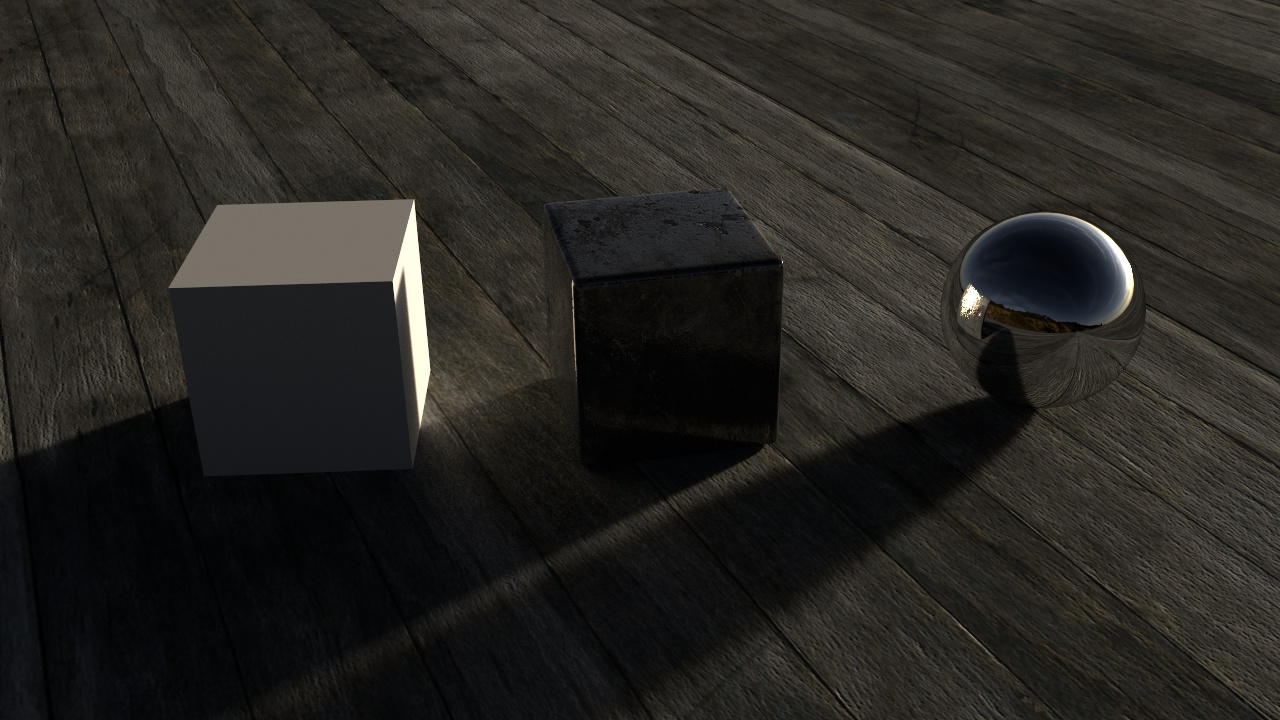
On the left is the plain setup with the HDR plugged just into the colour.
The middle is with the node setup above, the image plugged into the strength too (brightened with a multiple math node)
And the right one is with some extra adjustments:

Notice that the colour hasn’t been altered at all.
The Multiple math node is just to brighten it up, but the orange mix node mixes that strength value with white, effectively decreasing it’s contrast and making the shadows less harsh (thanks to Sir Reyn for the great idea!)
Now the blue mix node is where it gets a little more technical: The Light Path node gives us access to the different sorts of light rays. It’s common to see people use the Is Camera Ray to make something look a certain way to the camera, but behave differently for the rest of the scene – for example making a glass object look like glass to the camera, but the rest of the scene perceives it as plain old transparency, thus eliminating caustics.
Here we’re adding the Is Camera and Is Glossy rays (making sure to Clamp them so as to keep the result between 0 and 1 and continue energy conservation) and using that as the Fac of a mix between the strength driven by the image and a consistent strength (in this case of 5.0 since that’s what is bright enough for this HDR). So to the camera and in reflections (the glossy ray), the environment looks exactly as it did before we started messing with the strength, but it still lights the scene nicely.
Hope that isn’t too confusing for ya :)
Also remember to enable Multiple Importance Sample and choose Non-Color Data for the environment texture.
PS: For those of you who have been hiding in a cave the last few years, Reyn’s blog is a great one to follow! A true artist he is :)