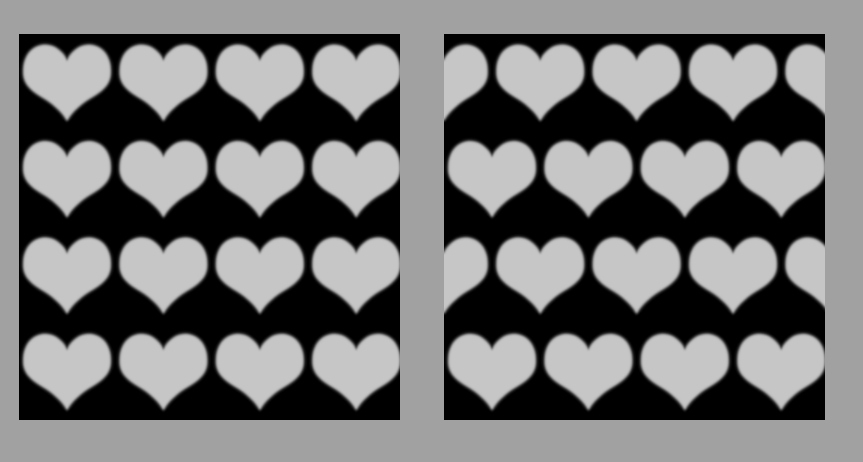
One useful feature that a lot of other 3d apps have is something called ‘Staggered’ tiling. Instead of just tiling an image normally, it offsets every second row so that it’s not quite as obviously tiled. The left image above is regular tiling, and the right one is staggered.
So as to be a true fanboy, here’s how to acheive the same thing with nodes in Cycles (and can probably apply to BI as well)
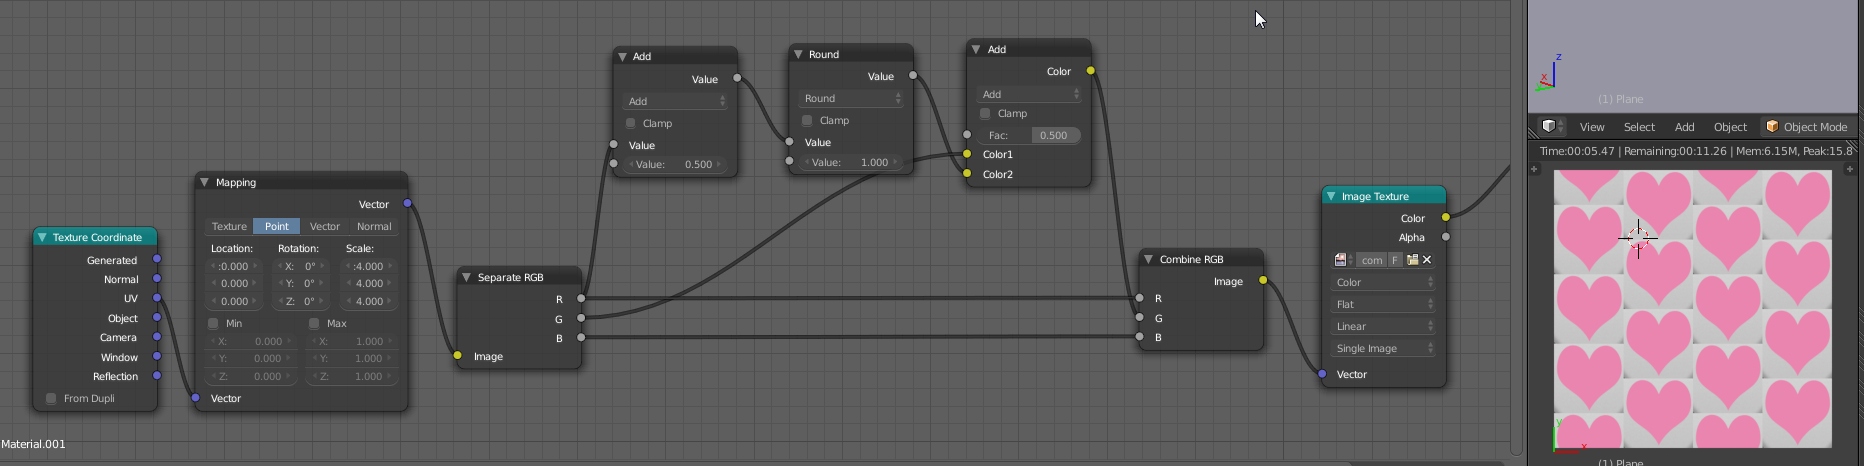
A short explaination: Remember that UVs can be manipulated as colours? Once you’re used to that, the possibilities are endless. This node setup takes the red channel (the X axis), rounds it to whole numbers so that there are incrementing solid blocks of colour for every repeated UV space, and then adds that to the green channel (the Y axis) so that it’s offset, staggered.
If you want to stagger it the other way, it’s just a matter of swapping the R and G channels:
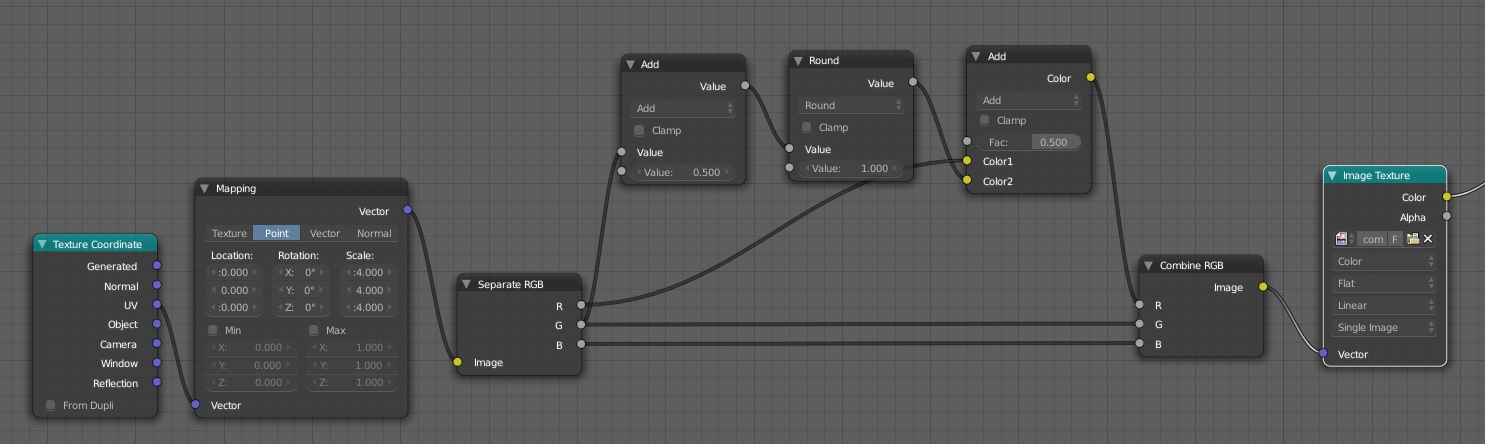
As of 2.71 we now have separate/combine XYZ nodes to help clarify this usage.
Ah, just a few days ago I was photoshopping those. Thanks.
I have double checked and double checked, and I am certain I have the exact same node set up (I tried rgb separate/combine and then xyz separate/combine and both do the same, and I’ve also tried different scale values), and it’s not working! What am I doing wrong?
If I replace the last add node with a multiply I get the expected effect where each row the scale is adjusted.
SOLVED, the newer versions of blender they took out the factor of the ‘add’ math node, I added another math node multiplying the output of the ’round’ node by 0.5 and adding that value to the Y channel
The 2nd “add” node is a color “mixrgb” node and not a math node, shift A> Color> MixRGB
Thanks!
Hey great tutorial, so far the only one that truly works for me. But is there a way to offset the rows so they overlap like fish scales ? thanks