I googled a bit, and was surprised that I couldn’t find a good tutorial on how to convert an image sequence to an optimized GIF using Gimp. Sure, you can just export a bunch of layers as a .gif file, but it’s going to be pretty huge.
19.4 MB vs 0.5 MB
In fact in this example, the optimized gif is 2.5% the size of the unoptimized one. That’s 40 times smaller.
Overview
So there are a few things you need to do to bring the file size down. I learnt this somewhere online for sure, but I can’t remember where or find it on teh googles.
The process is basically this:
- Import sequence as layers
- Generate a palette (gif’s only support 256 colours)
- Optimize
- Save
Step 1: Import sequence
Firstly, go to File > Open as Layers…
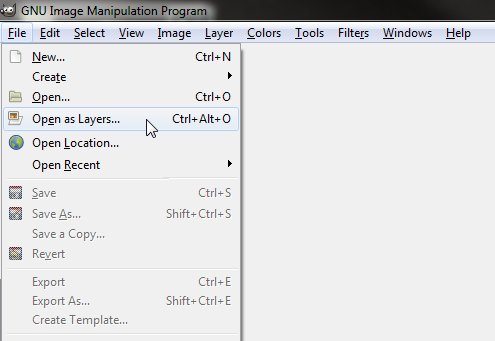
Then just select all the images in the sequence, and hit Open.

You’ll see that every frame is now on its own layer:
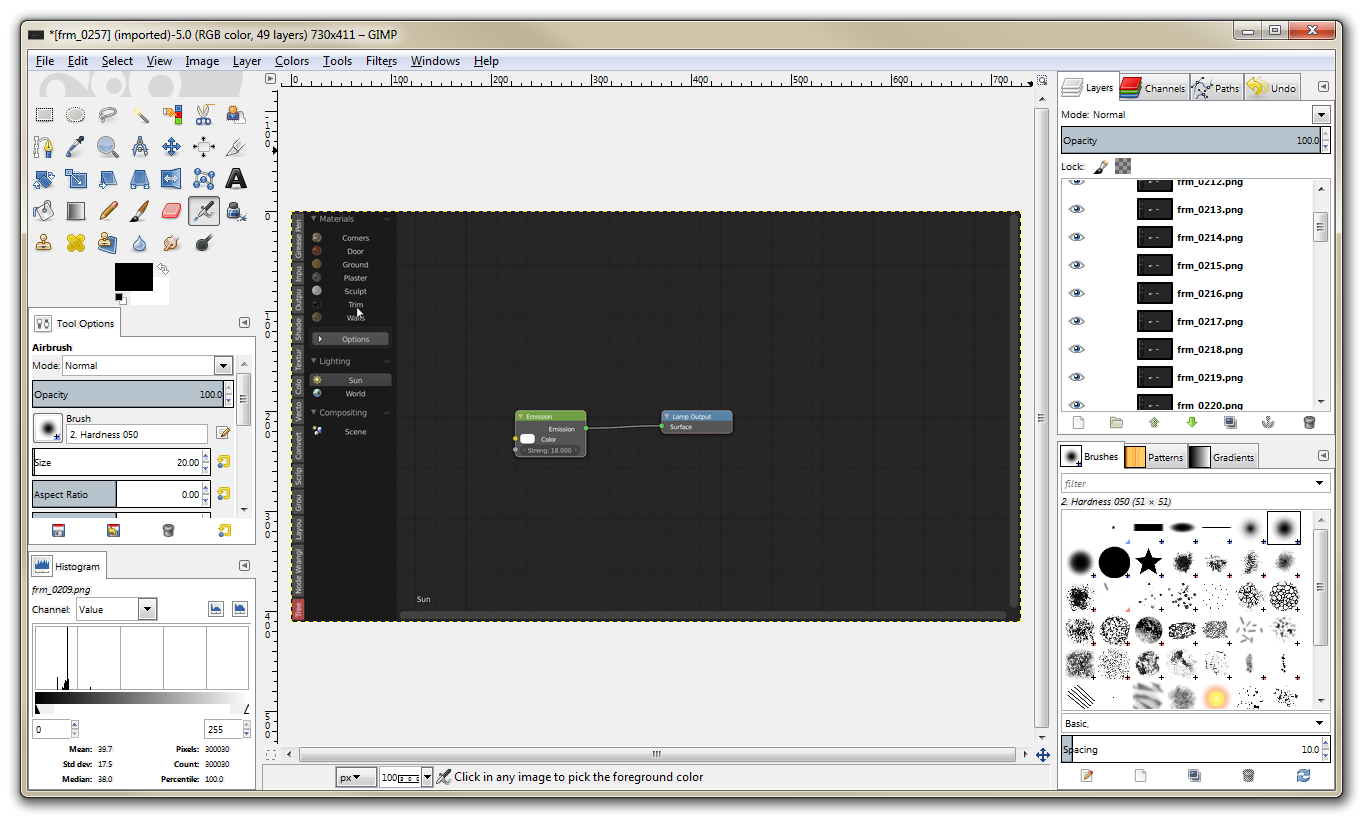
Step 2: Generate palette
Since GIF only supports 256 colours (unlike JPG and PNG which can handle 16777216), we need to generate a palette of the 256 most important colours used in our image.
So to do this, simply go to Image > Mode > Indexed…
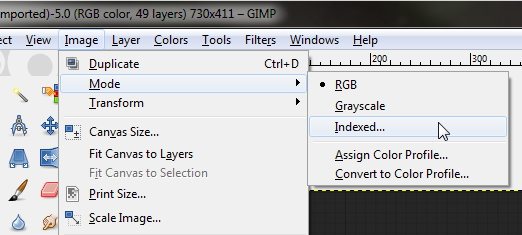
And choose Generate optimum palette with the highest number of colours you can.
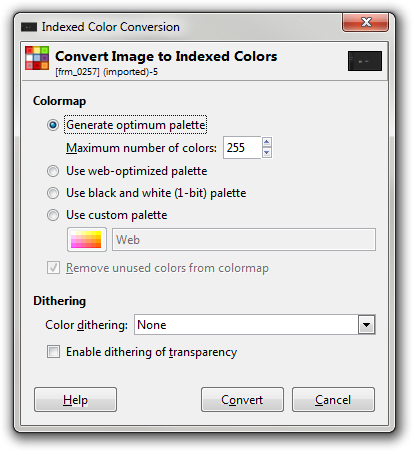
If you’ve got a lot of smooth gradients in your gif, you might like to enable Dithering to reduce the most obvious of the banding. But just note that this will increase your file size.
Step 3: Optimize
This is the part that really makes a difference.
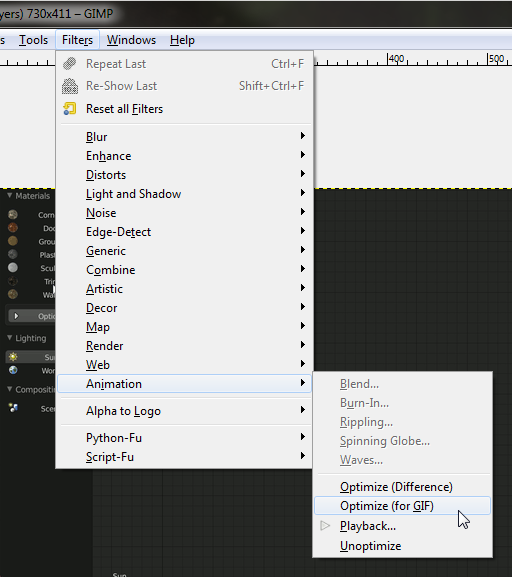
What this does, is it looks at each layer, and deletes the parts of it that haven’t changed since the previous frame. It only stores new values for pixels that change, and reuses information from previous frames when they don’t.
If a frame is exactly the same as the previous one, it removes that frame completely and just tells the previous frame to stay on the screen for longer.
Just take a look at the layers now and you’ll see what I mean:
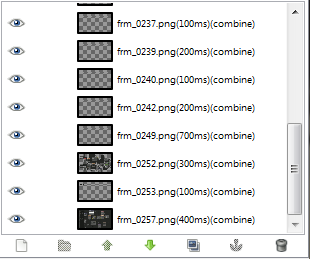
Most of them are almost completely transparent. They’re only opaque when something changes (like your tiny little mouse cursor).
Step 4: Save
The final step is to save the image.
GIMP, in its inexplicable quirkiness, requires you to “Export” an image instead of “Saving” it.
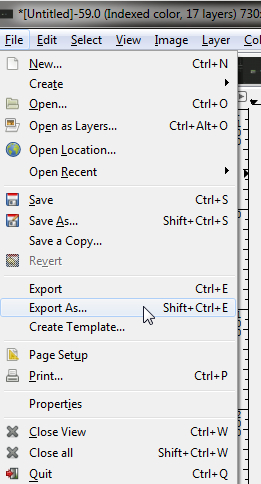
Then once you’ve picked your file name, hit Export and this options dialog will pop up:
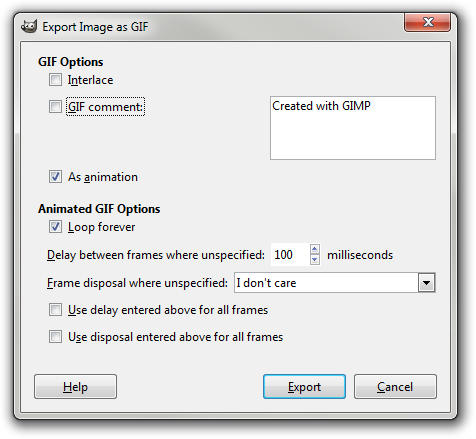
Obviously you need to check As animation, but the rest of the options are fine by default.
Disabling GIF comment will not only save you a few bytes, but it’ll ensure your reputation stays in tact. We wouldn’t want those Photoshop fanboys at work to discover that you actually use Gimp now do we… ;)
Bonus: Higher Frame Rate
By default, gimp will create your GIF at 10 fps. This is fine in most cases, but what if you want something a little more… 21st century?
Let’s say you want it to feel more like a video, say 30 fps. A nice round number, and multiple of 10.
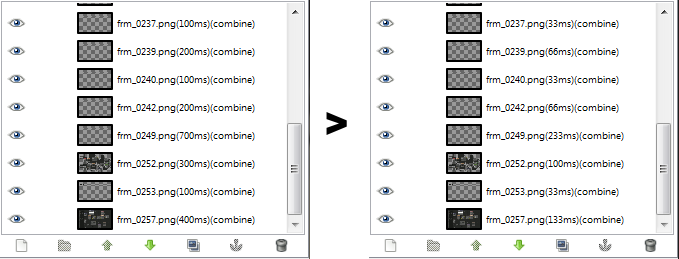
Basically Gimp gets the frame rate from the names of each layer. So what we want to do is rename each layer and specify the duration of each frame 3 times smaller than it is now:
If you have only a few frames, doing this by hand is fine.
But if you have a few hundred frames, you’re going to need a little script.
To use that script, open up the Python-Fu Console…
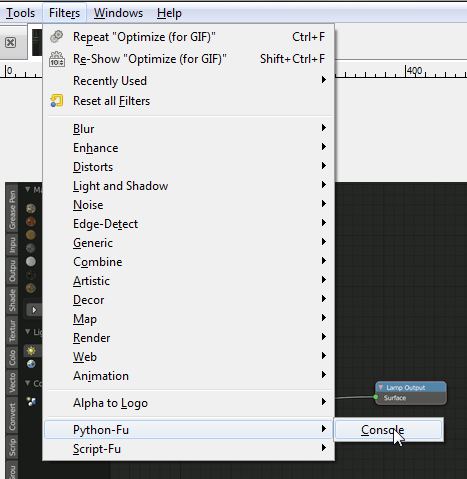
And paste the entire code in there:
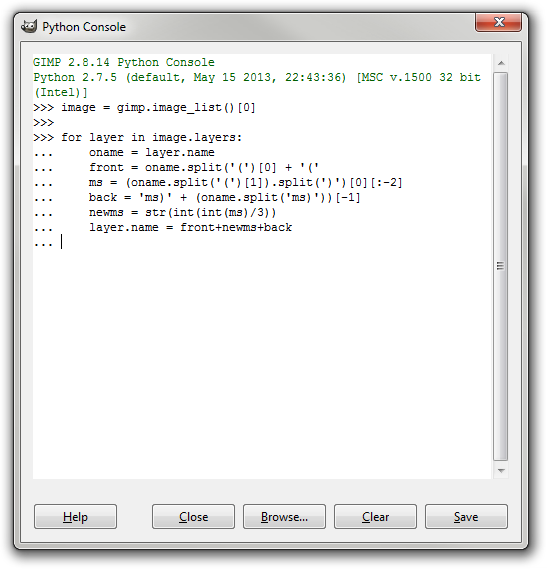
Then hit Enter and it should rename all your layers for you, dividing the durations by 3 to convert 10 fps to 30 fps.
Export it exactly the same was as before, and you’ve got yourself a 30 fps gif.
I’ve heard that some browsers/devices don’t support “such high” frame rates, but I’ve never had any trouble.
I thing the easies way to make gif animations is :
http://blog.bahraniapps.com/gifcam/
Easy and fast. maybe it will help you.
THANKS MAN! I was always looking for a quick solution to recording my desktop to GIF, I never knew that such a program existed xD
As to why I never knew, is because I’m using linux :P But GIFCam works PERFECTLY with wine :D
woah, that’s python-fu was really helpful, thanks for sharing Greg.
I found it useful too :)
I think ImageMagick can also do this.
Thank you very much
your article really helped.
I want to use GIMP to create gifs from video clips after following your instruction I made it, but they are kinda slow then the video and larger in size.