(and why you’ve been doing it wrong your whole life)

Common method vs physically accurate method
It’s hard to imagine a world without wine-glass tutorials, there are hundreds of them! Heck, I made two myself a few years ago.
Common method vs physically accurate method
It’s hard to imagine a world without wine-glass tutorials, there are hundreds of them! Heck, I made two myself a few years ago.
Here’s a little video on how to unwrap a belt. I wouldn’t really call it a tutorial, since there’s no audio, but just a screen cast for those who would like to know how to unwrap these sort of complex torus shapes properly.
Put some music on and enjoy :) you might also want to set youtube play speed to 2x or something ;)
Most of the stuff we do at my work is very stylized, which takes quite a bit of adjustment since I’m a realism nut. The only hard thing about the work I do there is getting simple things to look good. With my personal work it’s easy, just add detail and people love it! But learning to make simple things appealing is a very valuable skill, whether you like realism or not.
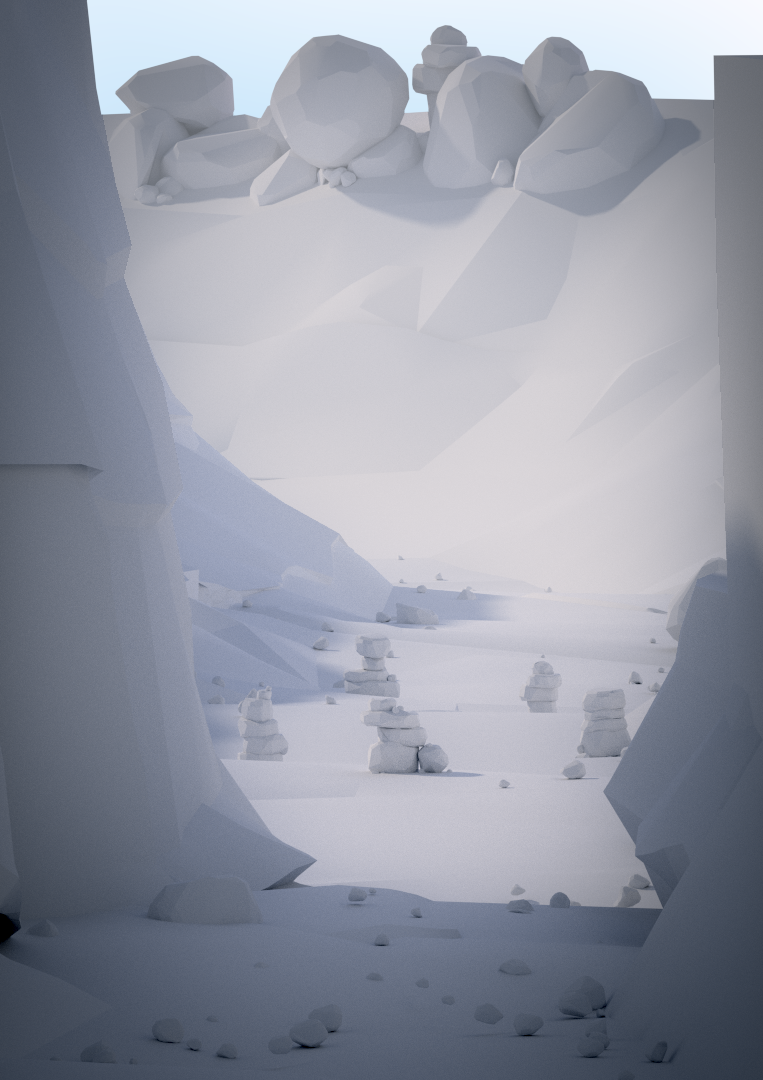
Lately I’ve been modeling lots of rocks and some terrain and I thought I’d share my workflow a bit.
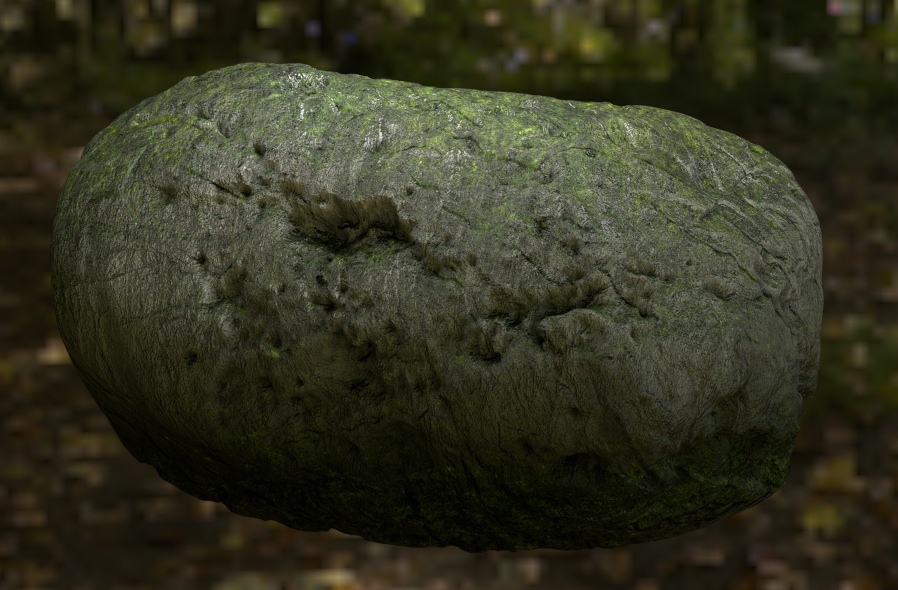
Modeling a realistic rock is easy. Just subdivide the crap out of it and add a displacement modifier.
 But stylizing them doesn’t really come natural to me.
So after half a day or so of playing, I came up with a pretty procedural solution.
Remember that since we used global coordinates for the first displacement to get the main shape of the rock, we just need to move it (or use an array modifier) to get a differently shaped rock!

Rocks are easy though, cliffs and other sorts of terrain require a bit of manual labour.
However, I’m not a fan of manual labour and still have some procedural tricks up my sleeve!
Cue the knife tool.
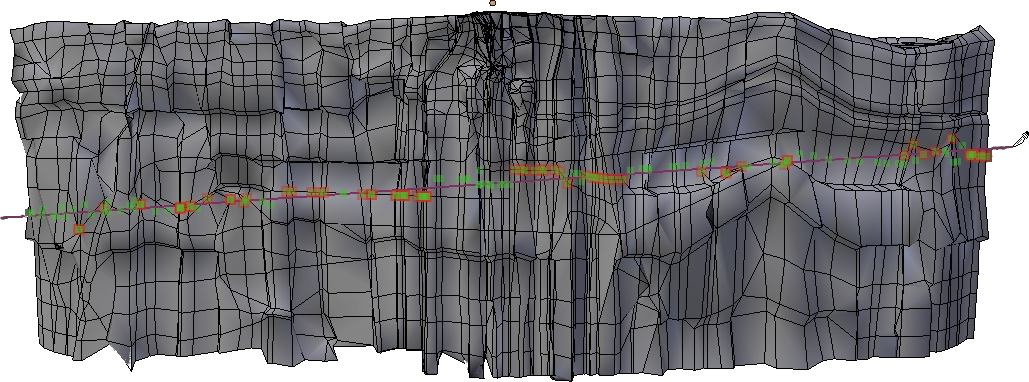
I made some fairly random cuts both vertically and horizontally to create some slate-like bits, and hit ‘Z’ to enable ‘Cut Through’ mode of the knife tool. Do this a couple times and you’ll end up with some pretty scary topology. Which is a good thing. Then I hacked at it with Proportional Edit mode in linear falloff to skew some of the shelves.
Now just add the same modifiers as with the rocks (though go easy on the big displacement) and you get a nice stylized cliff face.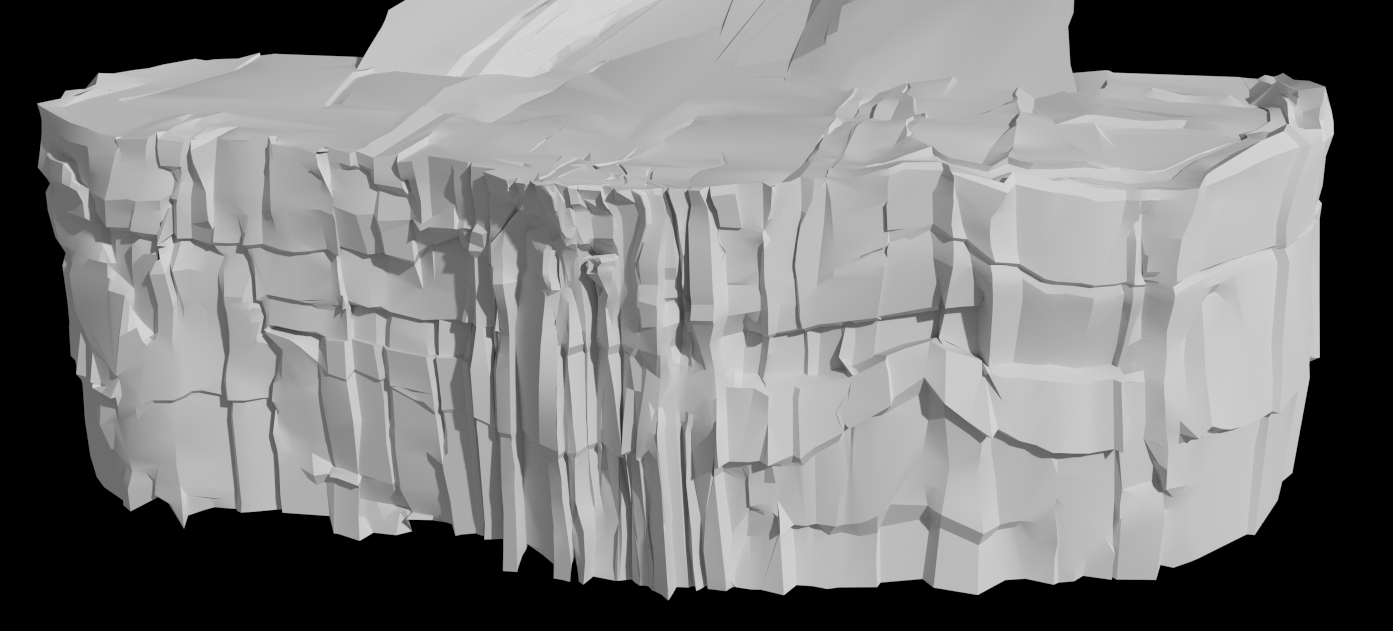
Now before you start to think this is turning into some crazy coder blog, here’s an addon you might actually use!

Tile sizes can be confusing and for some reason they actually make a difference in render speed! But why bother to figure it out when you can have a simple addon do it all for you?!
This addon takes care of that. Just enable it and you should never need to worry about tile sizes again!
It automatically calculates the best size when you change the resolution, or when you change from CPU to GPU and back, or accidentally change the tile size yourself! (although if you do want to set it manually, simply toggle the Auto Tile Size button)
We’ve all seen Andrew’s old post about how tile sizes affect render time, but its not quite as simple as this:
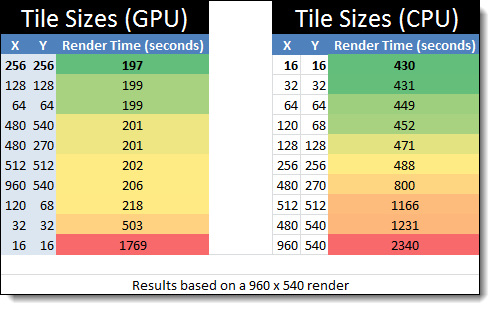 (Update: I’ve done my own extensive tests since posting this)
In fact, it’s not always a good idea to stick to powers of 2 for dimensions (32, 64, 256…). I know! Blasphemy! But in this case there’s some logic behind it. Or at least some proof.
If you always stick to powers of 2 for your tile sizes, you’ll often have tiles that are not all the same size (on the edges of the image) since most resolutions simply don’t divide cleanly into powers of 2 (1920×1080 is a good example)
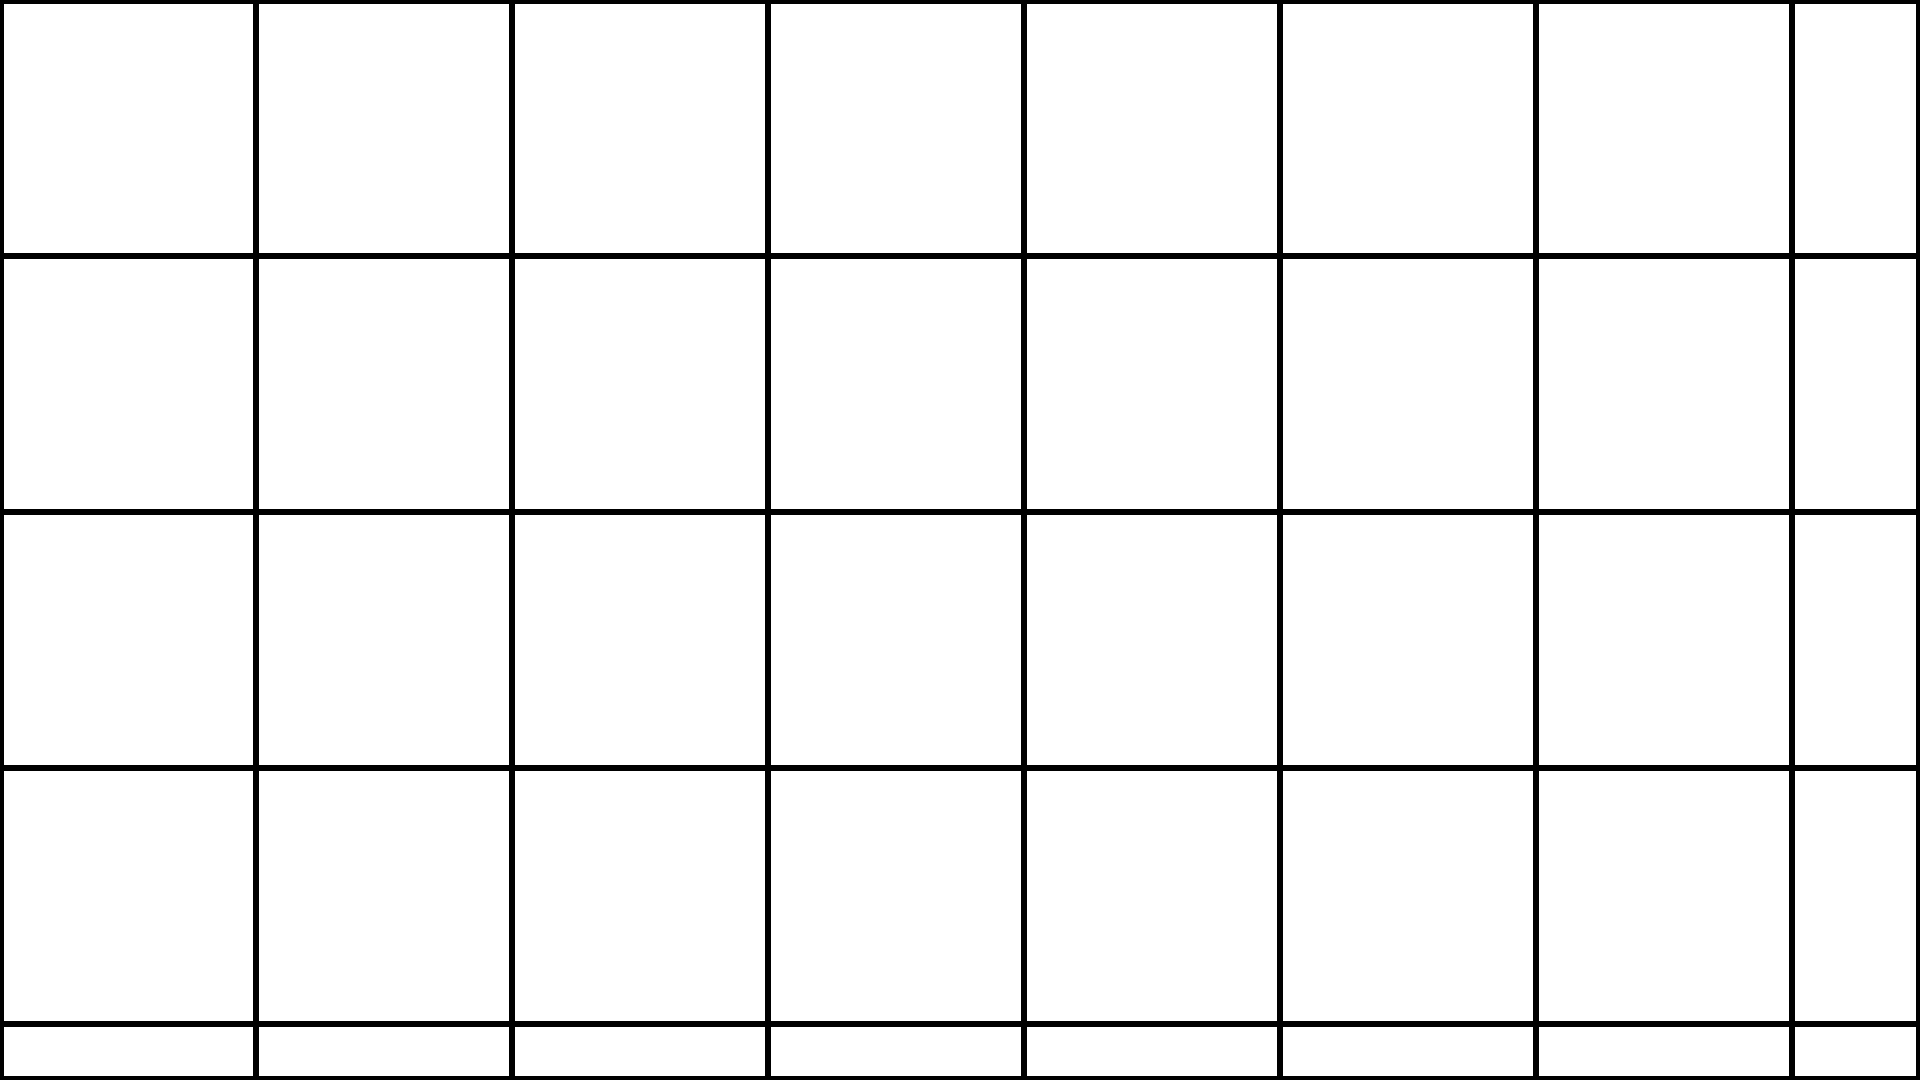
This is a 1080p image divided into 256×256 blocks. As you can see, the tiles on the right and bottom are not the same size as the others. You might think this is illogical, but these tiles don’t take a proportionate amount of time to render relative to their size. For example, the tiles on the right are about half the size of the rest of the tiles, but they take more than half the time to render.
Thus, it’s important to always keep all your tiles the same size and as square as possible. Being a few pixels skew from powers of 2 is not as big a deal as having inconsistent tiles.
That’s where this main purpose of this addon comes in.
It figures out what’s the best tile size closest to a power of 2 of your choice. For example, the best size for 1080p that’s closest to 256×256 is 240×270, making 8×4 consistently sized tiles

The addon stores the chosen target size separately for CPU and GPU in case you want to switch often, and defaults to 32 square tiles for CPU and 256 for GPU. Those are the best sizes in my experience, though sometimes GPU does better with 128 and CPU better with 64 – it all depends on the scene and the resolution.
[Download]
Removed ‘Set’ button – tile size is now automatically updated when changing target, render size or tile size (to manually change tile size, disable Auto Tile Size)
Improved accuracy for small tile sizes (result from 16 wasn’t so different from 32)
Now works for BI, hidden target option behind a “Show Advanced” type button
Alliteration aside, this blew my mind.
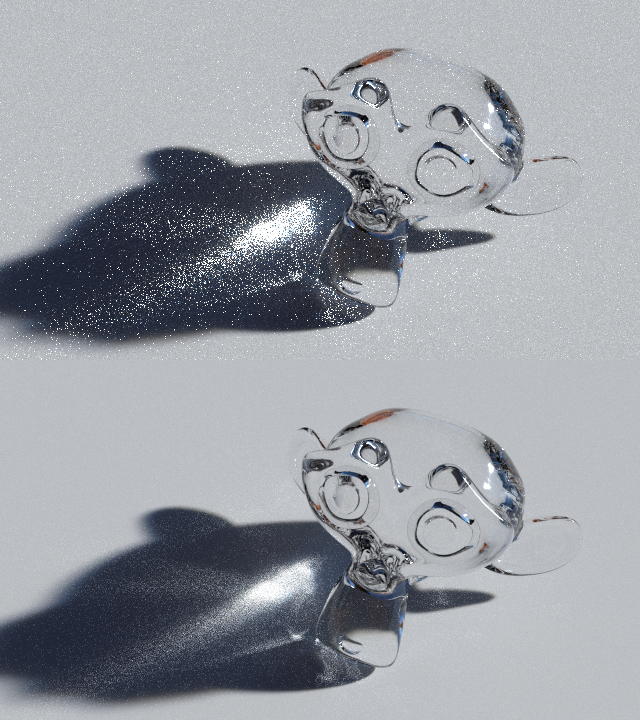
The two images above were both rendered in nearly 18 minutes on a 12 core i7 CPU. All materials and settings everywhere were exactly the same… sort of.
I’ve been playing with image stacking lately, mainly as a tool to render images and animations progressively, but when rendering some glass the other day, I realized that the only reason it renders so slow is because the noise and fireflies don’t change all that much, only more and more of it gets added and eventually averaged out. So if we change the noise pattern and render less samples a couple of times…
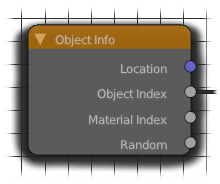
Now before you ignore me, I’m not talking about compositing here. I’m talking about the Object Index output of the Object Info material node:
The cool thing about this is that if you give a whole bunch of objects a single material, then you can still vary the material for each object by using the Object or Material index:
In the image at the top, I used a little bit of python to give each selected object a random index inside a certain range:
import random
for obj in bpycontext.selected_objects:
    obj.pass_index=int(random.random()*(640-440)+440)
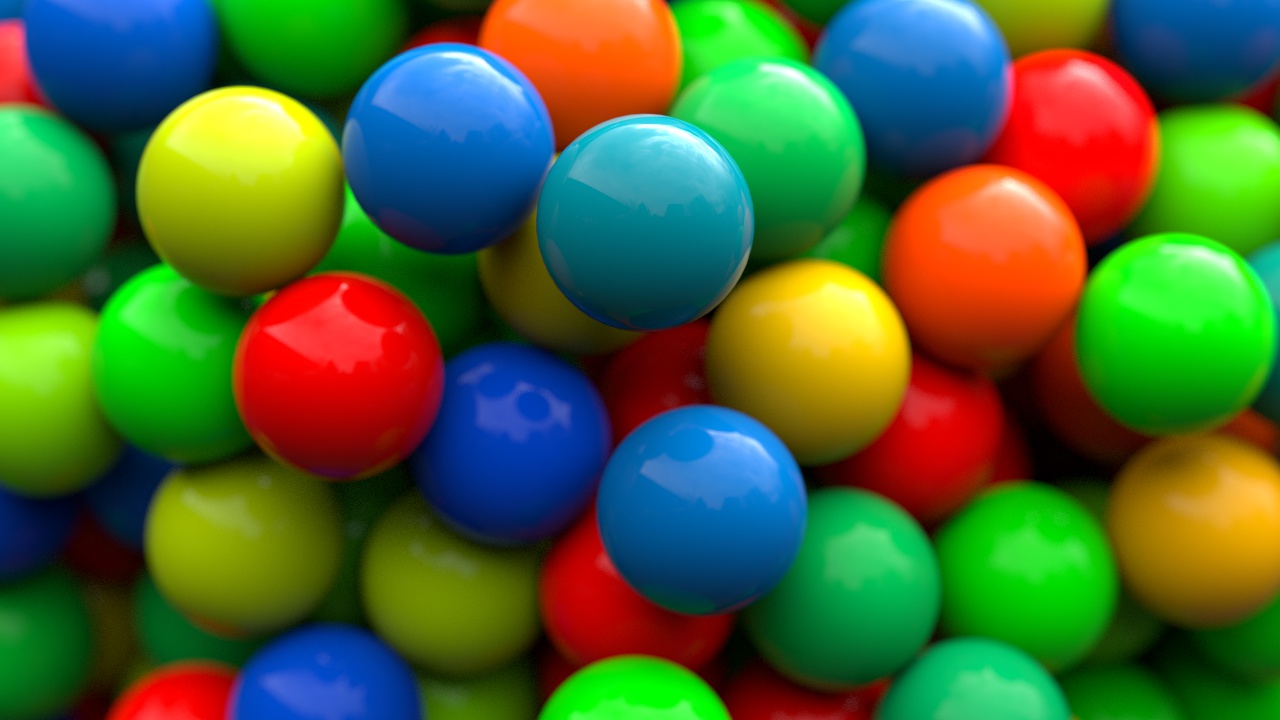
The range (between 440 and 640) is actually the range of colours in wavelengths. So plugging that into the wavelength node will give me a random colour for every object:
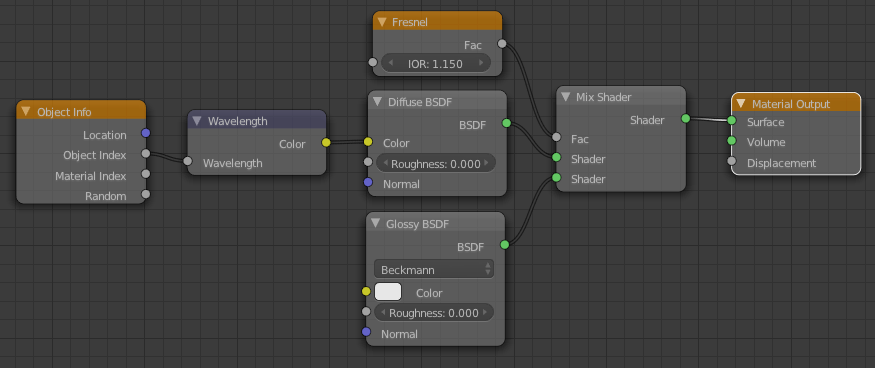
But we could do that with the Random output of the same node, albeit with less control, so here’s an even better example:
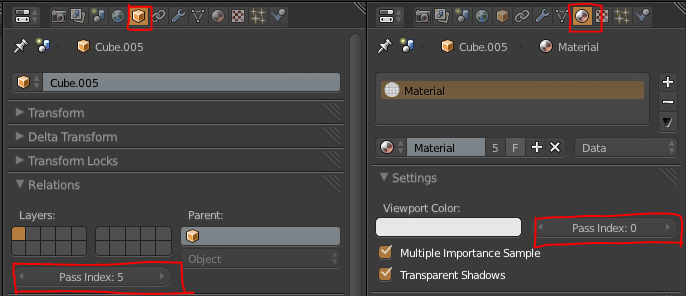
When you have a bunch of objects using the same material and you only want to change one of those objects, for example scale the texture up or down, you can use that object’s index as a mask and mix two things together with it. In the case below, making the object that has a pass index of 5 use tighter textures:
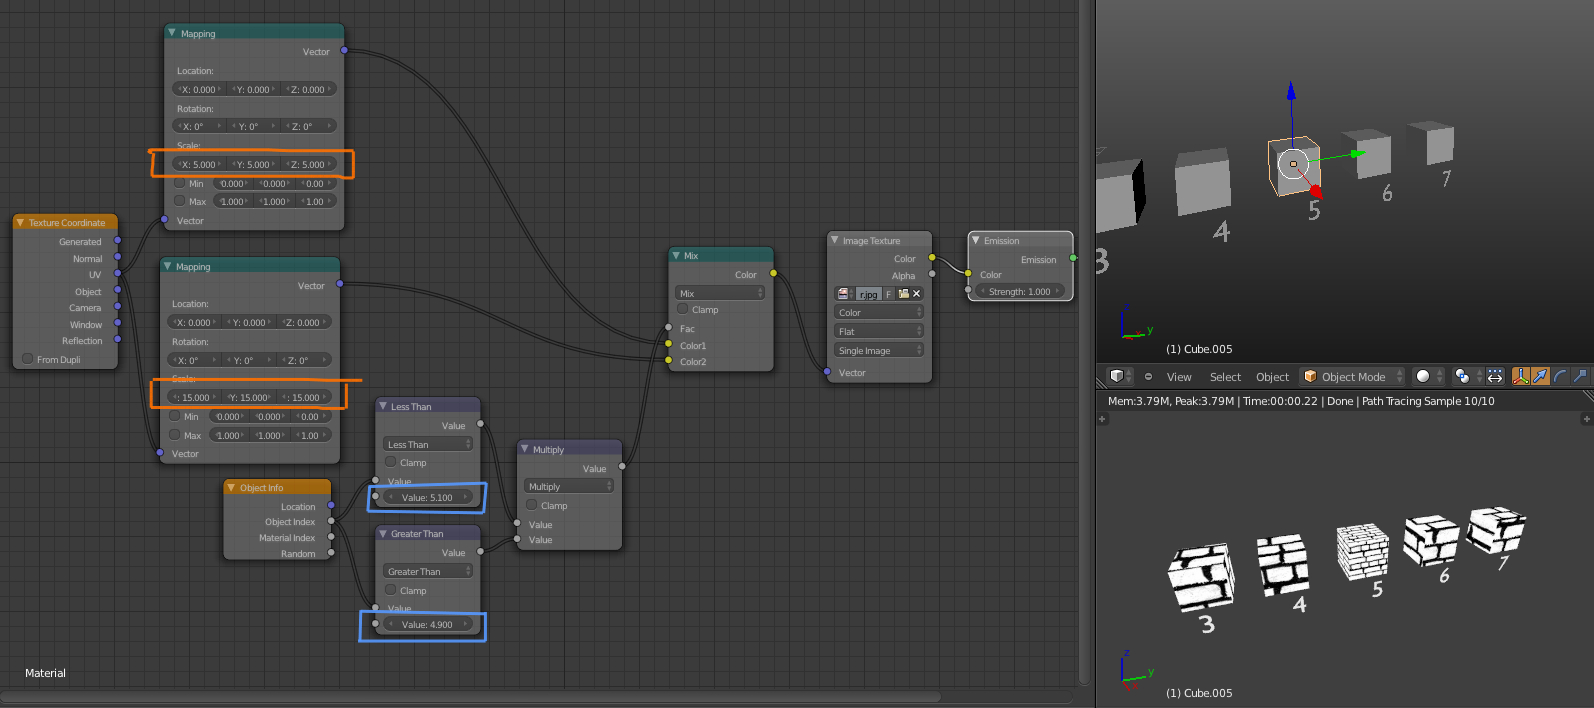 Since we currently lack an “Equal To” mode for the math node, we need to use the product of Less Than and Greater Than modes. The object index is an integer, so using 5.1 and 4.9 for those nodes respectively we can be sure that we’re only getting the index of 5.0
The mapping node’s Scale ability is really just multiplying the UVs (which is really just an ‘image’ where red and green represent X and Y coordinates, plug the UVs into an a shader’s colour if you don’t believe me). So instead of using two mapping nodes in the example above, use a Colour Mix node on Multiply with the same scaling values for the R, G and B and use the Object Index for it’s Fac.