Alliteration aside, this blew my mind.
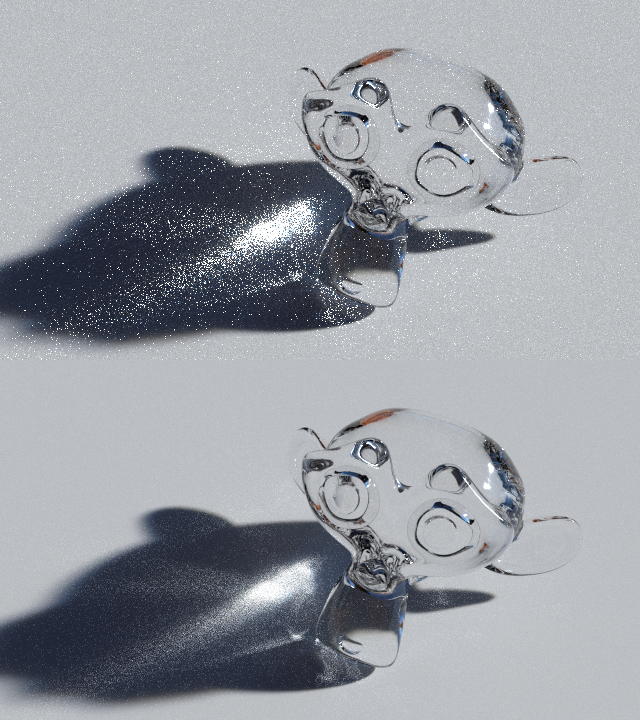
The two images above were both rendered in nearly 18 minutes on a 12 core i7 CPU. All materials and settings everywhere were exactly the same… sort of.
I’ve been playing with image stacking lately, mainly as a tool to render images and animations progressively, but when rendering some glass the other day, I realized that the only reason it renders so slow is because the noise and fireflies don’t change all that much, only more and more of it gets added and eventually averaged out. So if we change the noise pattern and render less samples a couple of times…
Yup.
The top image was rendered once with 3000 samples. The bottom, 10 separate times with 300 samples each with different noise seeds using my Progressive Animation Render addon (which also allows you to render a single frame like that) and then merged.
However despite my surprise and spamming the internet with “OMG look how clean it is!”, it’s not actually that amazing. Nor that accurate. Nor is it the only way.
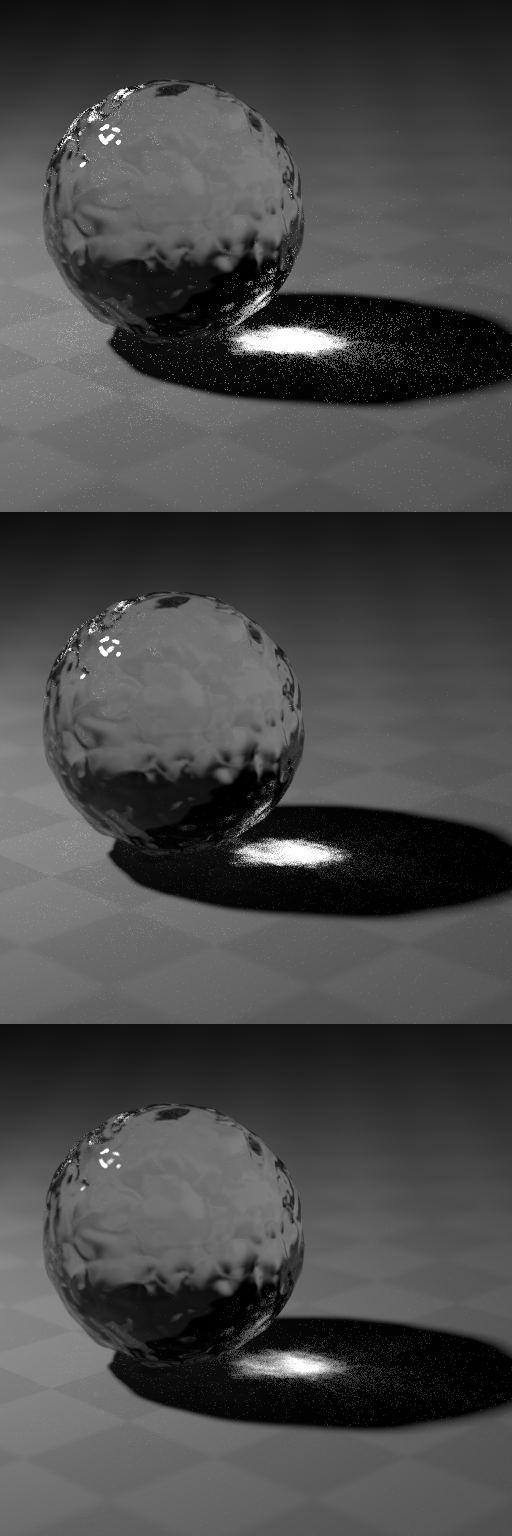
Top: single render, 3000 samples
Mid: 10 renders, 300 samples each
Bottom: single render, 3000 samples, Clamp = 50
Cue the Clamp setting.
This is something that’s been in cycles a while now. It might not make much sense why clamping values would reduce noise, so we first need to understand exactly why we’re getting noise:
The noise from caustics is often referred to as fireflies because initially it’s really bright pixels there are relatively far apart. When I say really bright, I mean brighter than you can actually see.

Our monitors show us a simple range of black to white. Black is really just 0.0 for the red green and blue channels, and white is 1.0. But what happens if we don’t stop there? What if we push past this visible barrier and into the realm of invisible math?

Instead of range from 0 to 1, this image is a gradient from 0 to 10.
This is where you need to start getting a little imaginative: It looks white… if you saved that image and picked that colour it would tell you it was a normal white… but is it really?
Not really. Since our monitors can only show up to 1.0 (and PNG stop there too), any number above 1.0 will look the same as 1.0 to us (assuming all three RGB channels are the same). The key here though is that when rendering, Cycles is smarter than your monitor. It knows about these high ranges of values and takes them into account when rendering and trying to converge noise, so even though those fireflies just seem to stay there permanently, they actually are getting darker and more like the surroundings each time it’s sampled, only you don’t notice it because it looks white.
That’s where the Clamp option comes in. It clamps all sample calculations to a certain value so that the fireflies aren’t as bright, thus they get darker quicker. The only problem with this is Energy Loss.
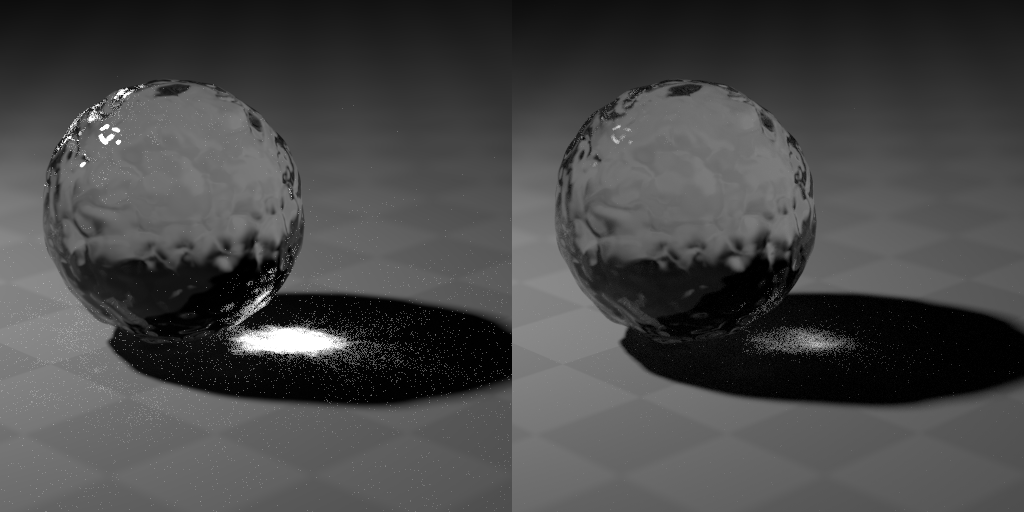
Left: Original
Right: Clamp = 10
If you use a clamp value too low, you’ll have less noise and fireflies, but there’ll be an obvious drop in brightness since clamping limits the brightness of the light rays in each sample. But use a clamp value too high, and you’ll get just as much noise as you started with.
The funny thing is, this is also what the image stacking method does. Since you’re saving each frame as a PNG, it’s automatically clamping those bright pixels down since PNG doesn’t support bright values. And if you save it as an EXR or HDR file that does support a high value range, image stacking won’t actually help at all – since you have a set of values where most values are low, but one value is really high, the average will probably be above 1.0 anyway and it won’t look any different.
However, the difference between the clamping saving a PNG does and the clamping the Clamp setting does is very important: The Clamp setting limits the sample brightness, while saving the PNG will limit the pixel brightness of that particular image. This is important because the Clamp setting will make the image darker than it should be, but if using image stacking instead then if all the rendered images for the stack have a particular pixel that’s always white (probably brighter than white, but it gets cut down to 1.0 when saved) then the average value will be white.
In the end, the difference is that the stacked image retains its highlights and bright bits where they should be but the areas that had fireflies far apart might be darker than they should be. The clamped image will have less contrast in the caustics because the samples are more similar in value but it could be darker than it should be and miss a few important highlights.
So the magic solution? Use both!
They both have disadvantages, but when used together the disadvantages become less noticeable.
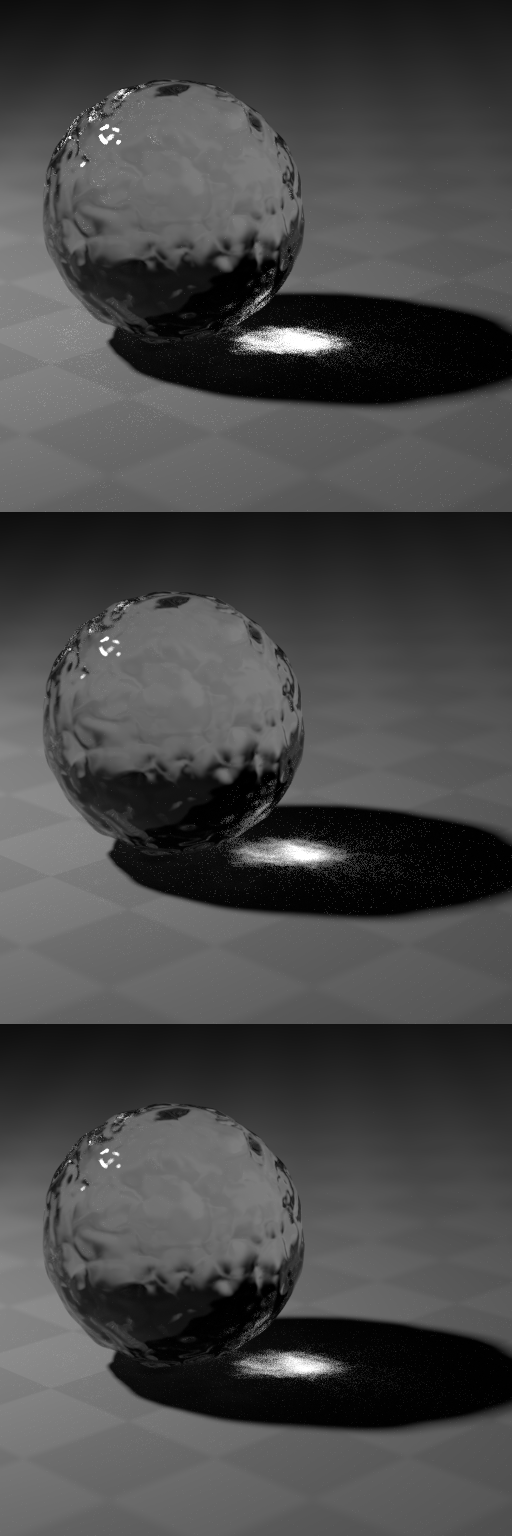
Top: Stacked
Mid: Clamped
Bottom: Clamped and stacked
So to conclude such a long article…. this static post has way too little colour in it.


:)
Clever. ;)
-Reyn
I knew a bit about this trick but never tried it. Nice walkthrough!
I don’t know if you’d be interested, Greg – but here’s a different take on the whole stack idea. Use the stack as a reference image. I restack and remove the fireflies selectively. Please try this if you have the time, or at least look at the before and after shots. :) thanks!
https://www.dropbox.com/sh/ekgad7nknurj0jw/d7yZDgZ6Lb
Why not just use the stacked image as the final?
Try it. The stacked image is great at averaging out the pixels, but in the end I was dissatisfied with how much noise was still left. I thought wouldn’t it be great if I had a perfect reference image to compare each pixel to? Barring that I did have the stack. All I’m doing is tamping down the bright ones but more selectively. Also, I’m taking out pixels based on hue. I was seeing fireflies that were not brighter but completely different colors.
Maybe I’m wrong. What do you think? Another perpetual motion machine?
Because you are using an averaging method, it’s leaving noise. The thing to remeber for me is that it’s not random noise, i.e. there are no black pixels in the noise component so a compositing method using ‘Darken only’ works with only two images removing the noise almost entirely. The noise that is left is dependent on how much noise there was in the first place; obviously nough smples have to be used to make the noise render as discrete pixels and not blocked in wite patches in which case randomizing the seed does not sufficiently change the noise locations.
BTW I ++Love this site! Keep it up.
Ooops. No editing of posts! Sorry about all the spelling mistakes – I’m not really five ears old.