Commonly Ignored Features #1: Multiple importance sample

For lamps and materials it’s on by default, so most people tend to ignore it. In certain cases it can help to turn it off, but most of the time what you really want to do is turn it on for Environment lighting.

MIS

From the wiki (which I wrote ;) ):

Multiple Importance Sample: Enabling this will sample the background texture such that lighter parts are favoured, producing less noise in the render. It is almost always a good idea to enable this when using an image texture to light the scene, otherwise noise can take a very long time to converge.

If you’re skeptical about the Importance of this (see what I did there?), check out this comparison:
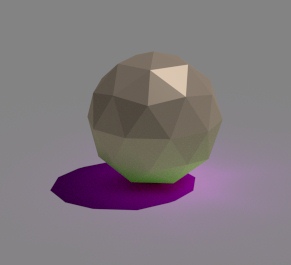
 

MIS off vs on

Both images were rendered for 25 seconds, the left did 1500 samples in that time, the right only 1000 but clearly produced a cleaner image.

If you’re using a particularly high res HDR, try increasing the Map Resolution, still keeping in squares of 2 (256, 512, 1024…). It’ll probably produce less noise, but at the cost of memory and render speed. Just play with it and see what gives the least noise for the render time.

Cube of Doom

Batteries not included

Batteries not included

Another little personal project. A doodle of sorts. It has no purpose.

It’s an old model from a blendernerd tutorial (fixed up a bit), re-shaded and textured with, yes, Cycles.

In highschool we had a subject called Engineering and Graphics Design which we all had to take for the first two years. I caught on really quickly (this was pre-blender-obsession) and enjoyed it a whole lot. Why I didn’t take it further? I don’t know. I suppose I would be an entirely different person now if I had taken it instead of IT or Art, so I think I’m glad. One of my best friends took it so I got to see what they all did there anyways, and it didn’t look like much fun. Anyways, this image reminds me of those days because we would always draw from an isometric point of view (an orthographic camera where the X and Y axis are symmetrical… I think)

It’s a 1080p image and well suited to be a desktop background even if I say so myself :)

Suzanne’s Revenge!

Rwar!

Rwar!

Not what you were expecting? Didn’t think so ;)

A while back I did a collaboration with the amazing Chris Kuhn for the sole purpose of fun and releasing the files on BlendSwap. We made a pirate ship. We decided early on what the ship would be called, but other than that we weren’t even sure what style to do it in.

All we knew was that Chris would do the modeling and I would do the texturing and rendering. However, the one thing I did want to model was the prow of the ship (the bit in the front that’s usually some kind of statue).

After much thought, I it might be fun to make it a one eye’d T-Rex. So I did! I sculpted him and textured him… and then realized that he has nothing to do with the ship’s name. So one last minute decision later and a certain familiar monkey is sitting up there instead.

I’m not upset that this guy didn’t get up there, he doesn’t really fit in, but I just thought I’d share him anyways so that he doesn’t get lonely on my hard drive :) Here’s the finished ship if you haven’t seen it (and download it!)

(yeah the ocean is crap)

(yeah the ocean is crap)

I’ve got a bunch of other slightly abandoned projects I’ll be posting soon, so stay tuned!

And as always, rendered with cycles ;)

Ray Depth

Thomas Dinges’ GSoC has shown some pretty awesome results for us Cycles fans, my favourites so far being the Wavelength converter and Separate/Combine HSV nodes (finally right?), but those are fairly simple additions.

The real magic comes in with the Ray Depth output of the Light Path node. The potential of this is pretty awesome, allowing control of what is shown or calculated on which light bounces. This could be used to get rid of some pesky fire flies, reduce noise from having many sources of light, or simply to have some fun:

2013-07-18_21-13-12Here is a slightly orangy sphere, but on the first light bounce it becomes really pink, and on the third suddenly it’s green!

Pointless yeah, but like I said, potential!

After some initial tests, it seems it doesn’t really give all that much of a speed up in render time (in fact in some cases it was slightly slower, but only slightly), but used properly I think it could help reduce noise quite significantly. For example, in a well lit room with a thousand candles: the candles don’t really need any of their light to bounce, direct light only would be fine. But any other sources of light probably still need a couple bounces to fill the whole room.

When it’s merged to trunk, expect another post with some proper documentation on how and where to use it :)

If you’re super eager to use it right now, just use a Math node on Greater Than or Less Than (depending on the use) to get a mask of how many bounces are needed – for example have a mix shader with Glossy on top and a Diffuse on the bottom with the Ray Depth and a Greater Than 1.9 to have a glossy material that is seen as a diffuse one after two bounces (It’ll look pretty much the same, but with potentially less fireflies). And yeah Thomas agrees that we need an “Equal To” mode in the Math node ;)


Node Wrangler!

Let your nodes arrange themselves!

(Download)

I challenged myself to some coding this past long-weekend. I have a nice big list of all the features I wish Blender had, and despite my recent addiction to python, are all way too hardcore for me to code myself… that is until now.

At work we use Maya mostly, so I often find a neat little feature that I wish Blender had and add it to my list. This time it was little button that arranged all your nodes for you, all nice and neat and linear. Surely something like this can’t be that hard to code, right? Well the more I thought about it, the more problems I found.

I checked out some weird and wonderful methods that other software uses, like Spring Force Directed Layouts where you basically simulate the nodes as if each connection was a spring to attract two nodes together, and all nodes that don’t connect, repel each other. After some simulation you get a pretty perfect node tree. Magic right?

The problem is that this technique is more for multi-directional graphs.

Graphs!

At least that was my excuse. Implementing physics algorithms is mostly beyond me for the time being.

So instead I did the logical approach. Fetch all the nodes that have no inputs (start nodes), and look at the nodes that connect to these. Put them to the right of the start nodes, then repeat for all nodes.

Node Wrangler UI

This ends up with one big long overlapping stream of nodes. So to separate them, I did another loop in all the nodes, if one overlaps another, move it down (by the dimensions of the node it collides with – thanks to lukas_t for adding this to the python API by my request!)

And after a couple more loops to make sure everything runs from left to right, it’s basically done.

Apart from this, I also added a button to delete all unused nodes and a tool to display the Backdrop image nicely fit in the window, but those were pretty tedious after the arranging thing.

So I suppose this means I should start tackling some more epic coding projects.

I work with nodes a heck of a lot, so if you’ve got an idea or request for an addon, let me know :) If you convince me that it’d be useful, I’ll do it for ya!

My Wishlist

http://wiki.blender.org/index.php/User:Gregzaal/wishlist

I’ve made a wishlist of sorts of all the things I wish Blender had, most of which are related to cycles or rendering in some way.

I’ve only recently started taking coding seriously, but I figured I’d better write down all my ideas before I forget them. This gives me a nice place to track what’s been done and what still needs doing, and organize things better for my own sanity and of course hopefully attract the attention of a more experienced developer ;)